How to Reverse Sear a Steak: Oven First, Pan Last
- How do you reverse sear a thick steak?
- When is the extra oven stage worthwhile?
- What should you prepare before cooking?
- How do you manage the oven stage?
- How do you get a trustworthy thermometer reading?
- How should you handle the final sear?
- When can you remove and rest the steak?
- What should you record for the next attempt?
- How should you store leftovers?
- Sources
How do you reverse sear a thick steak?
Reverse searing cooks a thick steak gently in the oven before browning it in a hot skillet. Use a food thermometer through both stages, transferring directly from oven to pan. Finish at an internal temperature of at least 145°F, then rest at least 3 minutes before cutting. A browned crust, pink center or fixed number of minutes cannot replace that temperature check.
This is a researched home-cooking method, not a report of kitchen testing. It separates oven cooking, surface browning and the final safety check so you know what each stage must accomplish.
When is the extra oven stage worthwhile?
For this walkthrough, choose one fully thawed, intact ribeye or strip steak roughly 1½ to 2 inches thick. That is our practical scope for a first attempt, not a claim that every cut needs the same thickness. Follow special package cooking instructions for tenderized or otherwise processed beef instead of substituting this method.
ThermoWorks explains that gentler initial heating reduces the temperature difference between the outside and center compared with searing first. The final sear then develops the crust. Its published recipe illustrates the method with thick ribeyes; its lower doneness preferences are separate from the safety endpoint used here.
| Your situation | Our suggested approach |
|---|---|
| One thick steak and time to monitor it | Use the oven-first sequence below |
| Thin steak or a recipe designed entirely for the skillet | Follow that recipe's method and verified endpoint |
| Several steaks but limited pan space | Plan separate finishing batches before cooking |
| Dinner must be ready at an exact minute | Choose a meal with more flexible serving arrangements |
For the wider menu, our steakhouse dinner planning guide covers organizing the side and serving equipment. Here the focus is the thick steak's oven-to-pan handoff.
What should you prepare before cooking?
Have the steak, salt, pepper and a small amount of cooking oil ready. This is a technique guide rather than a measured seasoning recipe: season to preference and use only enough oil to lightly coat the skillet's cooking surface. Avoid adding a complicated butter-basting stage on your first attempt.
You need an oven-safe rack over a rimmed tray, a skillet suitable for searing, tongs, dry oven mitts, a clean resting plate and a food thermometer. Confirm the rack is designed for oven use; some cooling racks are not. Follow the cookware and thermometer manufacturers' temperature limits.
Keep the steak refrigerated until preparation. FoodSafety.gov's handling guidance says to thaw in the refrigerator rather than on the counter and not to wash meat. Wash hands after handling raw beef; clean contaminated utensils and surfaces with hot, soapy water. Keep cooked-food plates and utensils separate from those used for raw meat.
Choose where the hot tray will land and where the finished steak will rest. Those are different destinations: the cooking tray can carry meat juices, while the serving plate must be clean.
How do you manage the oven stage?
Preheat the oven to 250°F. Place the dried, seasoned steak on the rack over the tray. Omaha Steaks' oven guide uses this setting for reverse searing and transfers the steak to a skillet below its intended finished temperature.
Our working transfer checkpoint is 135°F, leaving cooking to finish in the pan. This is an editorial checkpoint, not a safe serving temperature or a promise of a particular temperature rise. Check the center regularly as it approaches that point; an oven-rated leave-in probe can help if used within its instructions.
Prepare the skillet before the steak reaches the checkpoint. Transfer straight to the finishing stage. Do not refrigerate a partly cooked steak to sear later: USDA's Beef from Farm to Table guidance, preserved by Utah State University Extension, explicitly rejects partial cooking followed by refrigeration for later completion.
How do you get a trustworthy thermometer reading?
The sensing part of the probe must reach the meat's center. Keep it clear of bone, large fat pockets and the pan. A shallow reading near the hot surface can miss a cooler interior.
ThermoWorks' measurement guide explains checking through the center to find the lowest reading, including approaching from the side. Follow your own instrument's insertion and response instructions rather than assuming every probe senses only at its tip. Check more than one central position and each steak separately.
Remove a leave-in probe before searing unless its manufacturer explicitly permits that use. Clean the probe after contact with undercooked meat and before checking finished food, following its cleaning instructions.
How should you handle the final sear?
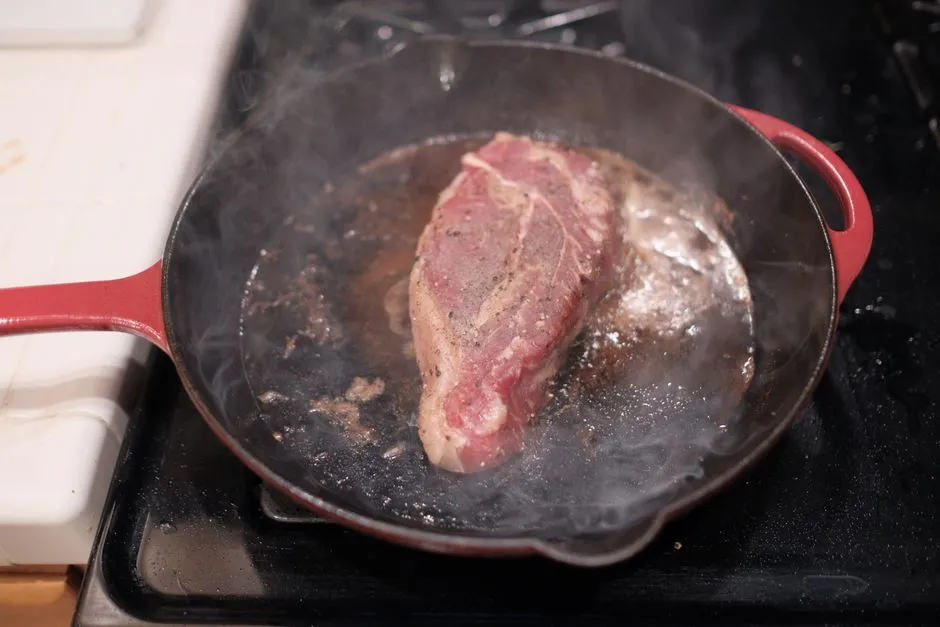
Heat the skillet according to its instructions and add the light coating of oil. Keep ventilation running, use dry mitts for hot cookware and stay at the stove. The U.S. Fire Administration says to turn the burner off if smoke appears or grease starts boiling. Do not make visible smoke your readiness test.
Place the steak carefully in the skillet with tongs. Brown the broad sides, turning and checking the center rather than committing to a fixed time per side. Keep hands clear of splashing fat.
Lodge's searing guidance emphasizes a dry surface and enough pan space. If the steak sits in liquid or overlaps another piece, correct that setup instead of increasing heat without checking.
If the crust is ready before the center reaches the endpoint, return the steak to the oven and continue cooking immediately. The oven remains available; extra pan browning is not the only way to finish the center.
When can you remove and rest the steak?
Reach at least 145°F internally before final removal from heat, then rest at least 3 minutes. These are the FoodSafety.gov minimums for beef steaks. Do not subtract an assumed carryover rise from the cooking endpoint.
Move the finished steak to the clean plate. Start its rest timer, then serve promptly once the rest is complete. Finish sides beforehand so they do not require a prolonged delay. Explore the site's sauces and sides when planning the next dinner rather than adding another task during this sear.
What should you record for the next attempt?
Make a short cooking note: cut and thickness, oven setting, transfer reading, final center reading, browning result and what you would change. Keep observations separate from assumptions. “The crust was darker than I wanted” is useful; “this cut always needs less heat” is a conclusion one dinner cannot establish.
Change one controllable choice next time, such as pan crowding or when you prepare the side. Keep the safety endpoint fixed. More steak technique can help you choose the next skill without changing the whole meal at once.
How should you store leftovers?
Refrigerate perishable leftovers in shallow containers within 2 hours, or within 1 hour above 90°F. Discard food left out beyond the applicable limit. The cold-storage chart gives cooked meat 3 to 4 days at 40°F or below. Reheat leftovers to 165°F, checking with a thermometer.
Sources
- ThermoWorks: reverse-sear thermal principles.
- Omaha Steaks: cooking steak in the oven.
- ThermoWorks: measuring a steak's center.
- Lodge: searing in cast iron.
- FoodSafety.gov: safe minimum temperatures.
- FoodSafety.gov: four steps to food safety.
- USDA: Beef from Farm to Table, hosted by USU Extension.
- FoodSafety.gov: cold storage.
- U.S. Fire Administration: cooking fire safety.